 |
 |
 |
|||
|
I'm learning the art (or is it a craft?) of stained glass. At this weblog, I record progress, note useful links, and document flesh wounds. Links
The Art League
Weisser Glass Studio
Virginia Stained Glass Co.
Warner-Crivellaro
Glass Galleries Links List
The StoreFinder: Stained Glass Store Front
ArtGlassArt.com Tutorials
rec.crafts.glass
Nancy's Beginner Tips and Tricks
Splinter Removal Tips
Syndicate this site
Archives
By Date
November 2006 October 2006 May 2006 June 2004 October 2003 September 2003 August 2003 June 2003 May 2003 April 2003 March 2003 February 2003 January 2003 December 2002 November 2002 October 2002 September 2002 By Project Beaded Unity Candle Crocus Panel Dogwood Windows Green Tiered Lamp Lilypads/Lotus Panel Transoms Xmas Ornament |
 |
October 28, 2002: Life, the Universe, and Everything
42 pieces leaded.
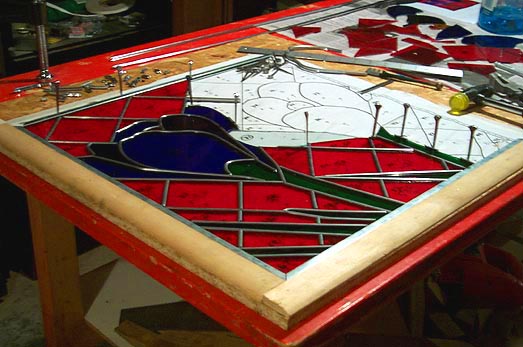
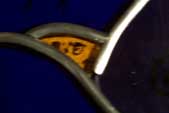
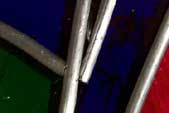
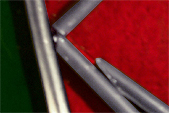
That includes one of the two pieces that were broken last week. In order to replace it, I traced its shape from the building pattern onto clear glass, cut and ground the clear glass to fit, then traced around that piece onto Dark Violet glass and cut and ground that. For the other piece that was broken, I have the clear piece cut and ground, but I think I'll see if I can shape the lead using the clear glass before cutting the stained glass. I'm finding that with curvy pieces, their fit may be altered by how closely you're able to curve the lead around them. With wavy or squiggly lines of multiple small curves especially, it's tough to make precise bends. The 42 pieces now in place also include two that just didn't fit right, so I recut them. One of those was due to the squiggly-lead factor above; the other was all straight lines so I'm attributing its bad fit to straightforward screw-up on my part, somewhere in the cutting or grinding process. I'd feel better about the progress I'm making if not for these three gaps:
Posted by Michelle on October 28, 2002 10:18 PM Comments
you mean those three gaps that the rest of can barely see and you probably used a macro lens to capture? those ones? give yourself a tiny little break, ok? Posted by: judith on October 28, 2002 10:37 PMheh. until I finally do trade in my three-year-old brick of a digicam, no macro lens for me. my concern is that I'll end up with glass gaps that, no, you can't really see when it's lying flat... but will possibly be all too obvious when the panel's hung in a sunny window. I am cursed with the ulcer-making combination of pessimism and perfectionism. (why, yes I am a lot of fun at parties!) Posted by: Michelle on October 28, 2002 11:25 PMWhat you've got so far looks really impressive, though, and yay! on finding the solution to the broken pieces problem. I was wondering how that would be resolved. Posted by: Adrith on October 29, 2002 08:47 AMHi Michelle, Those gaps will be easy to fix using a technique my class learned last week called a "dutchman." Basically you cut a piece of lead to fill the gap, push it in with your fingers (not tools, you may break the glass), then solder it in place. Cut your H came in half first (i.e. top/bottom halves). You'll probably have to do it on both sides of your panel, but once the joint is covered with solder you won't even notice it. Ask your instructor for more details. My instructor said it is a commonly used technique to fix minor and even major mistakes like broken glass. It looks great! Cheers, Bruce. Posted by: Bruce on October 29, 2002 11:51 AMBruce, you are my hero. Just full of well-timed helpful hints. Thank you! I have class tonight (and egads, can I just mention how scary it is to load a piece this far into assembly into the trunk of the car and have it rattle-rattle-rattle down the city streets all the way to work?) so will definitely ask my instructor about "dutchmen" then. Thanks again. Posted by: Michelle on October 29, 2002 12:18 PMComments are closed. Contact me via the email address at the bottom of the blog pages.
|
|||
| Copyright © 2002-06 Michelle Kinsey Bruns. E-mail me at my first name at this domain. (Take that, spam spiders!)
|
|||||